Showing posts with label Tarte. Show all posts

Sunday, November 20, 2016

GRWM: Matte Eye


Hi lovelies!!

This part of a double post, one here and then a video on my YouTube channel!! 

I posted a video that was a get ready with me, a complete matte eye! Woot Woot!

If you want to check out the video, head over here (link)

This is a list of all the products used in the video!


Face:
  • Primer - Mary Kay Face Primer
  • Primer - Benefit The Pore Fessional
  • Foundation - Kat Von D Lock-It in Light 46 Cool
  • Concealer - Maybelline Master Conceal in Fair
  • Powder - Mary Kay Sheer Mineral Pressed Powder in Ivory 1
  • Bronzer - NYX Matte Bronzer in Light and Medium
  • Blush - Tarte Amazonian Clay 12-hour blush in Dollface
  • Blush - Milani Baked Blush in Red Vino (only on the apples of the cheeks)
  • Highlight - Becca Champagne Pop


Eyes
  • Primer - Mary Kay Eye Primer
  • Shadows (numbers correlating to the picture)
    • Ulta - Au Naturel, all over the eye, and used to blend out the finished look
    • Morphe in Caramelized (#1) in the crease and blended up)
    • Morphe in Nuts (#2), mixed with Morphe in Vixen (#3) and Caramelized to darken the crease.
    • Lorac Pro pallet Espresso (#4) blended into the outer V of the eye
    • Morphe in Crystal (#6) in the inner corner as highlight
    • Morphe in Trouble (#5) to set my eye liner
    • Eye Liner - Revlon Color Stay in black/brown
    • Mascara - L'Orelea Voluminous Extra Volume in black/brown
    • Mascara - Almay Get Up and Grow in black/brown

Brows
  • Anastasia Brow Powder Duo in Medium Brown
  • Mary Kay Clear Brow Gel
Lips
  • NYX Mega Gloss in Beige


And there you have it folks!! It's a pretty simple look and should be easy to re-create with any shadows you have.  The reason I mixed so many shadows together was because Caramelized was a bit more orange/warm tone than I had intended, so I used some of the other shadows to cool it down and darken it up!!

If you haven't, please make sure to jump over to my YouTube page and watch the video!!

Until next time,

xoxo,
Mikal-Anne


***** Links listed above may contain affiliates links.****
** Not a sponsored video. Post contains my genuine recommendations and opinions. ***

Friday, July 31, 2015

Get Ready With Me Series Part 4 & Ulta Lip Crayon review


Welcome back!! I hope that everyone has had a great week!  I’m not going to lie, I am super excited for the weekend.  We have gone out of town for the last three weekends in a row! I feel like all I’ve done is pack, unpack, laundry, repeat!  I don’t know about anyone else, but being out of town can be exhausting!  I’m not complaining because I am really blessed to be able to be doing the things I’m doing, it just leads for busy weeks between work, and playing catch up from the weekend!

This weekend though, we have a wedding for one of the BF’s friends, that’s in town and that’s it!  I’m definitely looking forward to some down time!!

Now… onto the real reason you’re here!  The fourth and final installment of the Get Ready With Me and Review series!!  The last three weeks we have covered the look up to the point that my face look is done and we’re on to eyes and lips. 

If you missed the reviews, we’ve covered NYX HD Concealers (link), CoverGirl 3-in-1 Foundation (link), and HIKARI blush (link)

Today’s review will be on the Ulta Lip Crayon!!

Now, getting started on the look … I know some people do their make up in a different order, but I’ve always been a person who does my face, then eyes, and finish with lips.  Now that my face is done, let’s get started on the face!  Some of this may sound familiar because many of these products are ones that I used in my Every Day Smokey Eye look (link).  Today, however, I was going for a lighter look and so I left out some of the darker shades.


I start with the Mary Kay Eye primer – this happens to be what is in active rotation in my collection right now, I’ve used this for years!

Ulta eye shadow in Bermuda Sand - I apply this all over my eye lid and all the way up to my eye brow.  I use this shade pretty much every day.  Most of my eye looks have this as the base under everything!

Urban Decay eye shadow in Beware from the Oz Great & Powerful pallet - I take this on a big fluffy brush and apply it in my crease.

Urban Decay eye shadow in West from the Oz Great & Powerful pallet - I use this shadow to darken up my outer corner of my eye lid

I then go back in with Beware to buff out West and create a more natural transition.

Ulta eye shadow in Au Naturel – I also use this one every day. The light pink is the perfect shade to blend out the shadows and add just a bit of highlight under my brow.  Taking a big fluffy brush I buff and blend out the edge of the other shadows up to my eye brow. 

For my liner, I apply Revlon Color Stay eye liner in Brown to both my upper and lower lash line. Using the built in smudger to smudge out my lower lash line making sure to only going about 3/4 of the way into my inner corner.  I then use a brown eye shadow to set all of my liner to ensure it will stay all day.  Setting a pencile liner will also help soften any lines. 

Now the last part of my look… Mascara… and I am still using multiple mascaras.  I don’t think it’s possible to get one mascara that adds length, volume, and separates!  The three in rotation right now are:

Revlon Lash Potion by Grow Luscious in Blackened Brown
L'Oreal Paris Extra Volume Collagen Mascara in Black Brown

Almay One Coat, Get Up & Grow in Black Brown


Once my eyes are done, it’s now on to my lips…  Before I even start my makeup, I make sure to pay attention to my lips.  When I am applying my face moisturizer I also apply some to my lips.  Right now I just have a container of Carmex on my vanity that I apply.  This helps in a few ways.  First, by applying moisture to my lips, but also by creating a barrier.  This allows for me to apply all of my face products without staining my lips.  No one likes the foundation on your lips look!  Well, at least I don’t!  SO, once I’m done with all of my other makeup I wipe off my lips (this is usually because I’m brushing my teeth before work!) and then apply whatever lip look I’m going for.

A while back, I placed an Ulta order online and the thing I love about shopping online with Ulta is they send you samples.  Included in my order was a sample of Ulta’s Lip crayon. 

I was super excited when I opened the package and saw that it was a normal color and actually a color that I would purchase!  On top of that, it is a good product!  It has a good color pay out.  This shade is a my lips but better shade.  On top of that it’s creamy and lasts! 

The one thing I don’t like about some lip crayons are the ones that you have to sharpen!  Ugh, who has time for that!?  This one is in a tube that you just twist up when you need more.

This has become a staple in my routine.  It pretty much lives in my purse because I wear it almost every day to work and whenever I’m out and about and need to add some color.  It’s not a color that you really have to think about.  No liner or gloss needed.  Perfect for on the go application!

That’s it for my makeup!  As for my hair, it kept it simple. After blow drying I just used a straightener to quickly straighten out any kinks and to make sure that all of my ends were turned it.

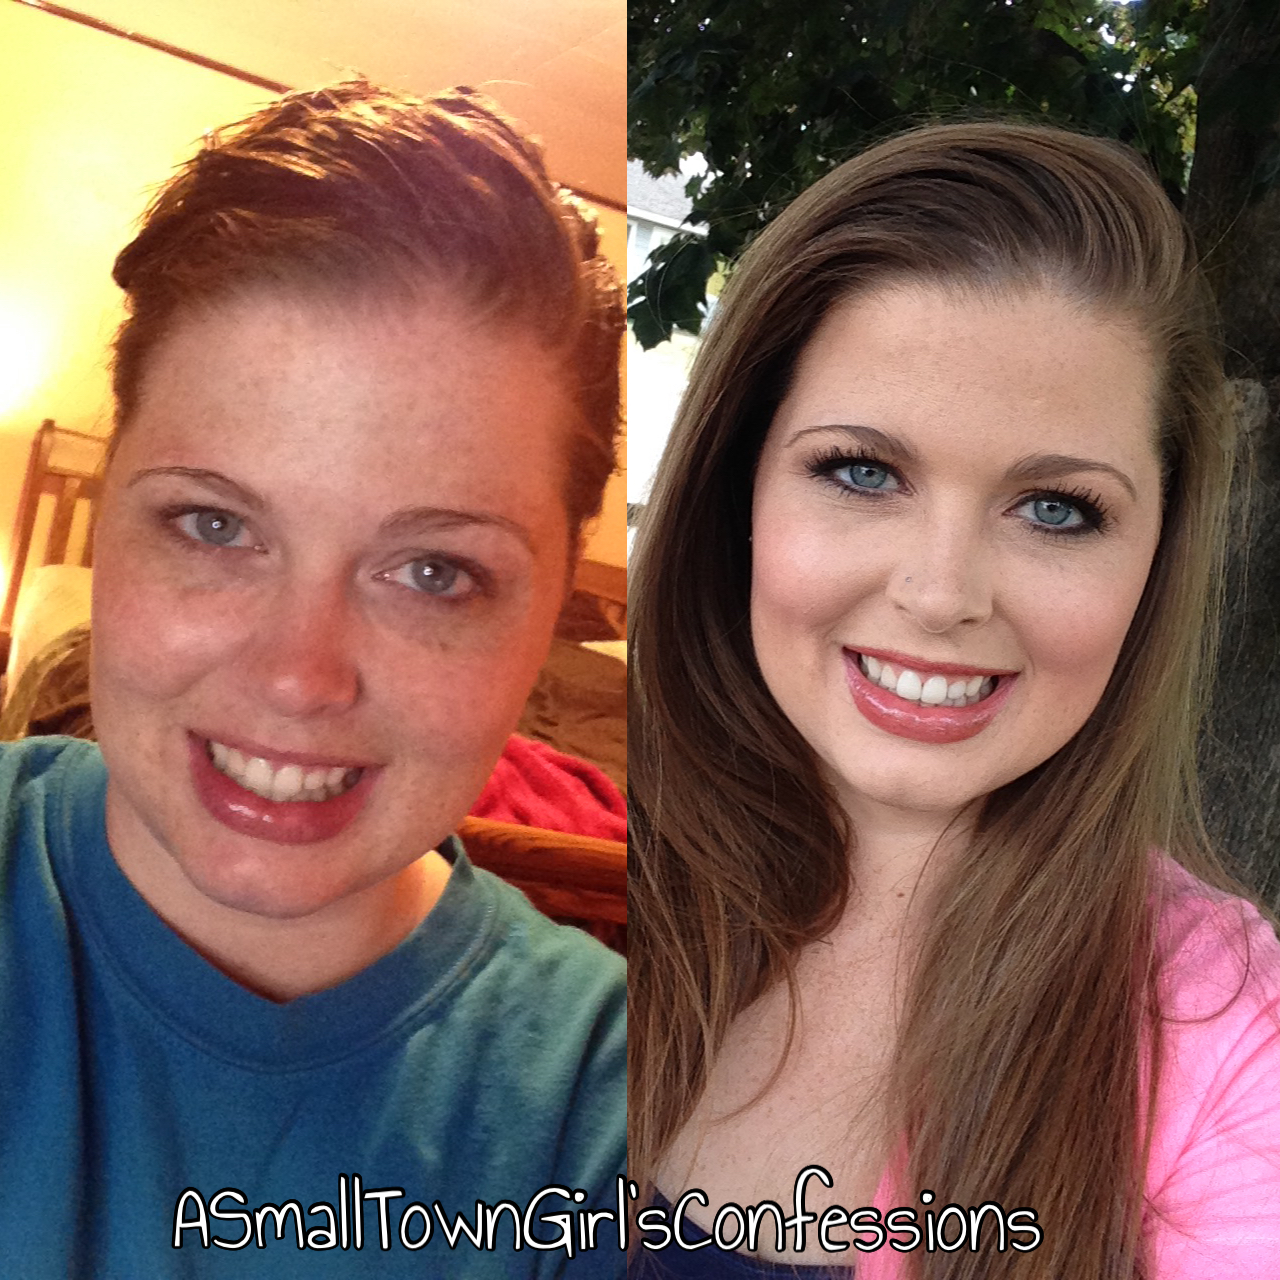
Here's the before and after again!


Breaking it down into many blogs makes it seem like a lot of steps, but this is a really simple look.  Actually, it’s pretty close to my go to look when I just need to get out the door.  You look put together, but not overdone and it doesn’t take long to get out the door.

What does everyone thing of this series!? Is it something you’d like for me to do again?  Let me know!

Also – let me know if you have any products you want me to demo or review! I’m also up for suggestions!!

Are you ready for another review?!  I’ve been on a reviewing kick lately.  Lots of new things to share.  Next week I’m going to talk about Real Techniques’ Miracle Complexion Sponge and the best way I’ve found to clean it!

Until next time lovelies!

Xoxo,
Mikal-Anne


Friday, July 24, 2015

Get Ready With Me Series Part 3 & Hikari Blus Review


Welcome back!  Happy Friday!  We’ve successfully survived another week!! 

This blog is part three of the Get Ready With Me and Review series.  In a series of blogs, I've gone over what I've used to create the look you see below.  The last two weeks we have covered the NYX HD Concealers (link) and the CoverGirl 3-in-1 Foundation (link).  This week we will cover the HIKARI blush.


Now, before we get into the blush, I need to catch you up on the steps between the foundation and the blush.  As covered in the previous blogs, you know that I first use a concealer that matches my skin tone to conceal any problem areas, then I apply the foundation, and lastly I use a concealer that is a little lighter than my skin tone to lighten up areas of my face.  After all of that I apply something to set both the concealer and the liquid foundation.

To set my concealer I use Tarte Smooth Operator.  I got a small sample around the holidays with something I bought. It's perfect to set my concealer!

To set my foundation I use Revlon Nearly Naked Press Powder in 010 Fair.

Next I use NYX Matte Bronzer in Medium. This is a staple in my makeup routine.  I discovered it years ago and have probably used it with every single makeup application I’ve done since then.  I use this to do both bronzing and contouring.  I am not someone who does a very harsh contour.  This is mainly because I am so fair, that too harsh of a contour doesn’t look right. 

Finally, I apply the HIKARI blush in Tango.  I got this in my Ipsy bag back in April (link) and I’m not going to lie, when I saw it, I was very intimidated!  I think the best description for the color is an electric watermelon! I’m so glad that I didn’t let that get in the way of me trying the blush because I LOVE IT! 


This blush has such an amazing color pay out, but it would be really really easy to get that horrid 80’s blush look.  I’m sure you know what I’m talking about.  That super bright color applied very heavily to the cheeks.  That wasn’t even a good look then!

To avoid rolling around looking like someone who is trying to relive the 80’s; I have found the best way to apply this foundation is with a stippling blush.  This allows me to apply a sheer amount and build it up until I get the look I am going for. 

The color adds a nice pink to the cheeks and gives a healthy glow.  I think this shade is absolutely perfect for spring and summer!  I honestly think it would be good for most skin tones too.  It gives that pinched pink to your cheeks, almost as if they are naturally that color and you don’t have blush on at all.

After I apply my blush, I pair this with a bit of a highlight because the blush is completely matte.  This is great for people who have oily skin and want to stay away from the shimmery or sparkly shades.  Today I used the Mary Kay highlight, but I’m any highlight would do. 

Next week, for the final blog in this series, will cover what I did for my eye look and a review on the Ulta Lip Crayon that I got as a sample when I did my Ulta order.  If you’re interested in seeing the lip crayon, it’s included in the blog I did about my Walmart and Ulta haul (link).

Until next week!

Xoxo,

Mikal-Anne

Monday, April 6, 2015

Monday Morning Coffee - Weekend Away


Good morning lovelies! Hope all of you had a wonderful weekend.  I know I did!  I got to visit my parents and my parents this weekend.   Which is way this blog is late getting up!  Technology just wasn't my friend!  Maybe it should be Monday Evening Wine instead!


My parents moved from Montana to Washington almost four years ago now.  I remember when they told me they were moving, I had a moment thinking, hey, isn’t it the kids that are supposed to move away, not the kids?  I feel like we’re doing this backwards! I was a grown adult and had been living on my own for years, so I was stable and good.  But, I had always lived in the same town as my parents and had made choices after college to stay in town so I could be close to my family.  I have a younger sister and wanted to be able to stay active in her life.  Thankfully, they only moved about 3 hours way, so I get to see them on a fairly regular basis!  I am thankful for that!

Anywho!  I headed over to Washington to spend the holiday with my family and thought I would share with you what I packed! 

When it comes to packing, I will NEVER be accused of under packing! I am very much so an over packer.  I have this fear of forgetting something and being in need of it.  I don’t know why, it’s not like  I’m out in the middle of nowhere and couldn’t get my hands on something, if I did happen to forget it!  But I commonly will throw something else in my bag, "just in case".

This trip had nothing special planned, so I just needed my everyday things, clothes, makeup, and bathroom stuff for me and then dog food, some treats, harness, and leash for the little man. Seems simple, but yet for being gone for four days, I still managed to over pack!


Lets start with my first bag. I like to separate my stuff out by when it's used.  My frist bag is my bathroom stuff.  So I have the stuff I have to take with me to shower in the morning or get ready for bed at night.  I like to separate this from my make up because I don't always need both at the same time. Plus who would want to lug a bag that's big enough to lug all of that stuff around?!?!?


I have had this pink and black bag forever! I'm not positive, but I think I got it at the drug store. The bag has the following:


- Shampoo and Conditioner.  These are just refill able bottles.  I haven't had to refill them in a long time, so I'm not totally sure what brand is in there, but I think it's the volume version of  Tresemme'

- Refillable pink squeeze bottle with the Mary Kay shave lotion/body wash.
- Travel size lotion.  
- Travel size bottles of both Tresemme' dry shampoo and hair spray.
- Refillable white bottle with Mary Kay Blemish Control Toner.
- Contact solution, case, and spare lenses.
- Toothpaste and floss.
- Carmex
- Orange container with small clear hair elastics
- Pink container with Mary Kay Timewise Moisturizer.
- Mary Kay Day and Night Solution
- Mary Kay eye cream
- I have repurposed a lotion container (the white one that the pink conttainer is on top of), and now I put my normal sized hair elastics and bobby pins in it.
- You may not be able to see it in the picture, but there is also my tooth brush, a wide tooth comb, and a nail file in there.


To save space in my bathroom bag, I take my normal containers and put the product in small travel sized containers.  My moisturizer, eye make up remover, and toner are all put into travel sized containers to save space.  I also have a baggie that has some q-tips, cotton squares, and face cleanser towels. 


Now, I keep my make up separate.  This is for ease and space.  For camping weekends or weekends at the softball fields, I pack a little lighter on the make up, but heading to my parents, I bring whatever I need for a full face.  Just in case we head out for a girls day shopping or anything, I know I can put together a full face!  Here's what I brought with me this weekend:


- I pack all of my make up in a Glitzy Glam make up bag.  This is the online store of YouTuber's Elle and Blair Fowler. (Click here for the website).  I like this bag, it's big and durable and is the perfect size!

- Rimmel Fix & Perfect Pro Primer
- Cover Girl, Ready Set Gorgeous in shade 105
- Cover Girl, Outlast Stay Fabulous Stay Fabulous 3 in 1, in shade 820.  I'm currently mixing foundations to get the right shade and combining these creates the perfect foundation!
- Real Techniques beauty blender sponge.
- Rimmel Match Perfection 2 in 1 concealer.  I use this one to cover up my dark circles and any other spots that are acting up.
- Cover Girl, Ready Set Gorgeous concealer in shade fair.  I use this one to highlight.  I am really fair skinned and it have to work to make sure my face doesn't fall flat. 
- Tarte Smooth Operator -  This is a small sample size that I got in a holiday collection.  I'm currently using this to set my under eye concealer. 
- Revlon Nearly Naked pressed powder in Fair 010
NYX Matte Bronzer in Medium - To be honest, this is probably a bit too dark for me, I have to use a light hand with it because it packs a punch!  It is a beautiful bronzer though!
- Jane Iredale, Bitty Brow Kit 
- Mary Kay eye shadow primer.
- Z Pallet with blushes and shadows.  I grab this almost anytime I travel because it has many shades of blushes and some staple colors of eye shadows, plus a bronzer and a highlight.  It's perfect
- The original Lorac Pro eye shadow pallet.  I like to take a pallet that has a full spectrum of colors, so that way I can do any eye look I may want.
- Pacifica eye shadow in Ethereal.  This is the perfect highlight for the inner corner of your eye!
- Pixi by Petra eye shadow duo in Apricot Glow.  I got this in my Ipsy bag this month and it's a current favorite!
- Revlon, Color Stay, eye liner in black brown.  This is a long standing favorite.  I have been using it for years and can't run out of it.  I always have an unopened back up waiting to be used!
Now, don't judge me here, I use three different types of mascaras!  Yes, three! they each do something different!!
- (first) Revlon, Lash Potion in black brown.  This us a great lengthening mascara!
- (second) Almay, Get Up & Grow in black brown.  Great for separating and avoiding spider lashes!  This is a great multi benefit mascara!  It does it all.
- (third) is a Revlon mascara in black brown, but it's so loved that I can't read the name!
- Travel container of all my favorite brushes!


Wow! Ok, I definitely don't travel light!! Please tell me I'm not the only one!!


Here's a picture of a look I put together with what I packed!


I love going out of town and having adventures, but hate the prep!  It seems like on either way of the trip there is always lots to do!  I work full time, so I have to do most of my errands and chores on the weekend.  So, when I’m gone, I have to get those things done during the week before I go and after I return.  I do see laundry in my future tonight!  I have to say, that is one of my least favorite things!!  I do wish I had the life of my little man though (pictured above), he’ll sleep all day today after being with my parents’ pups all weekend!  He has some recovering to do!!  


Hoping everyone's Easter was wonderful and blessed!!

Wishing everyone a wonderful week!!

xoxo,
Mikal-Anne