
Welcome back!! I hope that everyone has had a great
week! I’m not going to lie, I am super
excited for the weekend. We have gone
out of town for the last three weekends in a row! I feel like all I’ve done is
pack, unpack, laundry, repeat! I don’t
know about anyone else, but being out of town can be exhausting! I’m not complaining because I am really
blessed to be able to be doing the things I’m doing, it just leads for busy
weeks between work, and playing catch up from the weekend!
This weekend though, we have a wedding for one of the BF’s
friends, that’s in town and that’s it!
I’m definitely looking forward to some down time!!
Now… onto the real reason you’re here! The fourth and final installment of the Get
Ready With Me and Review series!! The last
three weeks we have covered the look up to the point that my face look is done
and we’re on to eyes and lips.
If you missed the reviews, we’ve covered NYX HD Concealers
(link), CoverGirl 3-in-1 Foundation (link), and HIKARI blush (link)
Today’s review will be on the Ulta Lip Crayon!!
Now, getting started on the look … I know some people do
their make up in a different order, but I’ve always been a person who does my
face, then eyes, and finish with lips.
Now that my face is done, let’s get started on the face! Some of this may sound familiar because many
of these products are ones that I used in my Every Day Smokey Eye look
(link). Today, however, I was going for
a lighter look and so I left out some of the darker shades.

I start with the Mary Kay Eye primer – this happens to be
what is in active rotation in my collection right now, I’ve used this for
years!
Ulta eye shadow in Bermuda Sand - I apply this all over my
eye lid and all the way up to my eye brow.
I use this shade pretty much every day.
Most of my eye looks have this as the base under everything!
Urban Decay eye shadow in Beware from the Oz Great &
Powerful pallet - I take this on a big fluffy brush and apply it in my crease.
Urban Decay eye shadow in West from the Oz Great & Powerful
pallet - I use this shadow to darken up my outer corner of my eye lid
I then go back in with Beware to buff out West and create a
more natural transition.
Ulta eye shadow in Au Naturel – I also use this one every
day. The light pink is the perfect shade to blend out the shadows and add just
a bit of highlight under my brow. Taking
a big fluffy brush I buff and blend out the edge of the other shadows up to my
eye brow.
For my liner, I apply Revlon Color Stay eye liner in Brown
to both my upper and lower lash line. Using the built in smudger to smudge out
my lower lash line making sure to only going about 3/4 of the way into my inner
corner. I then use a brown eye shadow to
set all of my liner to ensure it will stay all day. Setting a pencile liner will also help soften
any lines.
Now the last part of my look… Mascara… and I am still using
multiple mascaras. I don’t think it’s
possible to get one mascara that adds length, volume, and separates! The three in rotation right now are:
Revlon Lash Potion by Grow Luscious in Blackened Brown
L'Oreal Paris Extra Volume Collagen Mascara in Black Brown
Almay One Coat, Get Up & Grow in Black Brown

Once my eyes are done, it’s now on to my lips… Before I even start my makeup, I make sure to
pay attention to my lips. When I am
applying my face moisturizer I also apply some to my lips. Right now I just have a container of Carmex
on my vanity that I apply. This helps in
a few ways. First, by applying moisture
to my lips, but also by creating a barrier. This allows for me to apply all of my face
products without staining my lips. No
one likes the foundation on your lips look!
Well, at least I don’t! SO, once
I’m done with all of my other makeup I wipe off my lips (this is usually
because I’m brushing my teeth before work!) and then apply whatever lip look
I’m going for.
A while back, I placed an Ulta order online and the thing I
love about shopping online with Ulta is they send you samples. Included in my order was a sample of Ulta’s
Lip crayon.
I was super excited when I opened the package and saw that
it was a normal color and actually a color that I would purchase! On top of that, it is a good product! It has a good color pay out. This shade is a my lips but better
shade. On top of that it’s creamy and
lasts!
The one thing I don’t like about some lip crayons are the
ones that you have to sharpen! Ugh, who
has time for that!? This one is in a
tube that you just twist up when you need more.
This has become a staple in my routine. It pretty much lives in my purse because I
wear it almost every day to work and whenever I’m out and about and need to add
some color. It’s not a color that you
really have to think about. No liner or
gloss needed. Perfect for on the go
application!
That’s it for my makeup!
As for my hair, it kept it simple. After blow drying I just used a
straightener to quickly straighten out any kinks and to make sure that all of
my ends were turned it.
Here's the before and after again!
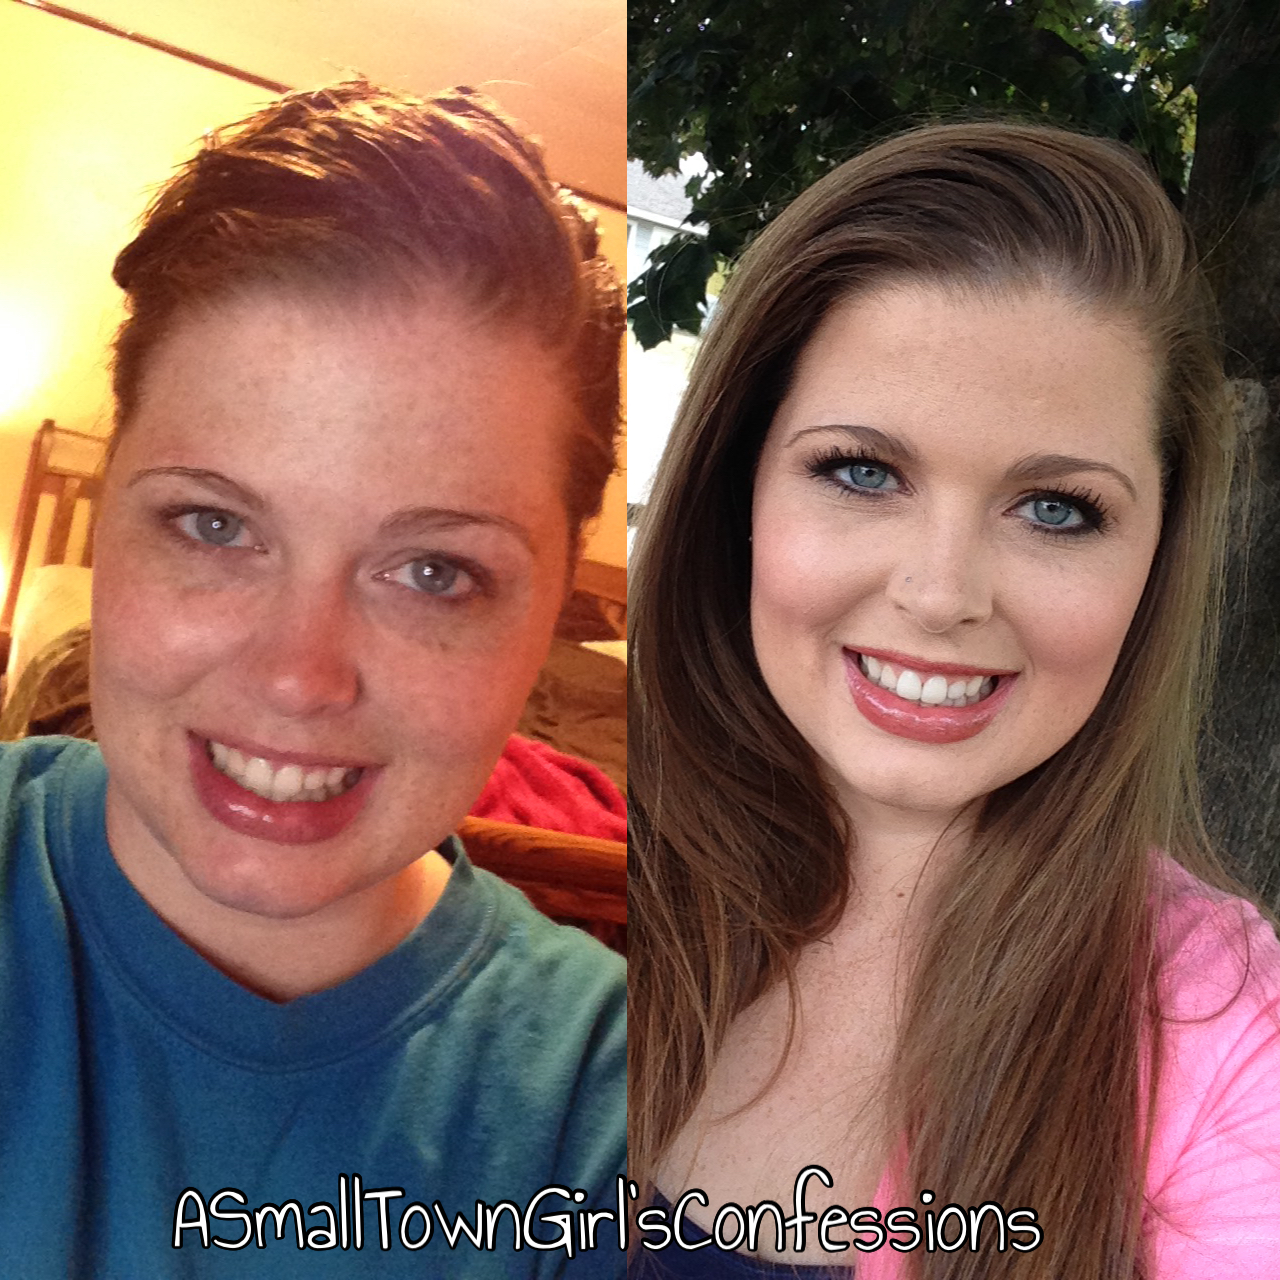
Breaking it down into many blogs makes it seem like a lot of
steps, but this is a really simple look.
Actually, it’s pretty close to my go to look when I just need to get out
the door. You look put together, but not
overdone and it doesn’t take long to get out the door.
What does everyone thing of this series!? Is it something
you’d like for me to do again? Let me
know!
Also – let me know if you have any products you want me to
demo or review! I’m also up for suggestions!!
Are you ready for another review?! I’ve been on a reviewing kick lately. Lots of new things to share. Next week I’m going to talk about Real
Techniques’ Miracle Complexion Sponge and the best way I’ve found to clean
it!
Until next time lovelies!
Xoxo,
Mikal-Anne


