Showing posts with label Primer. Show all posts

Friday, April 15, 2016

Nivea Men’s Post Shave Balm Review


I have officially Jumped on the bandwagon and tried the Nivea Men’s Post Shave Balm in sensitive.  Everyone has been talking about this since NikkieTutorials talked about it in her April Hits Video (Link to NikkeTutorials page). 


I personally first heard about this after watching one of Jaclyn Hill’s videos (link).  Then one day I was wondering through Walgreens and found it on sale!  I unfortunately  can’t remember how much I paid, but it’s on their website for full price of $6.79 (link).  I remember thinking, that is not bad for a primer, especially since it.s 3.3 fluid ounces.  That would last for a while!

This bottle is made of white glass with a thick plastic screw-top lid.  The packaging is not travel friendly because of its size and weight! The bottle is substantial!!


The product it’s self is a milkly white color and has a very runny consistency, I think it feels like a serum.  When you apply it to your face, it has a moisturizing and cooking feeling. The packaging doesn’t have a pump or any way to control the amount of product dispensed. When pouring it into your hand, be careful! It's very easy to accidentally get too much.  I’ve been there!

This does have a manly smell to it. I personally enjoy the smell.  It’s not over powering and as soon as I put my foundation on, I didn’t smell it anymore. Don't worry, you don't walk around smelling like a man all day! 

I used this product with two different types of foundation over a couple weeks.  With my first use of this product, I was impressed.  I liked the way it felt and my skin felt moisturized throughout the day.  I was impressed with the way that my foundation applied and looked throughout the day.  


This made me really excited.  To think that I found a foundation primer that’s so inexpensive!  What a score! But I’m sad to say, that as I continued to wear this product my impression of this product decreased.

With the second application – It all started to go downhill…

The very first thing I started noticing with this product is that it started to not allow me to build up coverage. I would apply foundation and if there were areas that need a little extra love, I would try to add just a bit more foundation or even concealer – This is where I ran in to problems.  If I tried to add more, the product would just pick back up off my skin. The best description of the look I started getting is the look of a sponge paint on a wall! – Yea, that’s the look I had on my face.  Not a good look and definitely frustrating!

Then, this started settling into all fine lines and pores! I have never felt that I have had very obvious pores, but with this product, I did!  It was awful.  It looked like all of the foundation on my checks settled into the pores, fine lines, or in the area around my nose.


The coverage also broke down in weird places on my face. From a distance, it honestly didn’t look too bad.  The closer that you got, the worse it got!  The dark circles under my eyes became fully visible. The smooth look to my face I was originally obtaining now just looks very blotchy!

I also noticed, that it started to break down on my nose and checks.  It almost looked like the foundation cracked. 

The final straw for me and the point when I decided that I couldn't make this work, is when I started noticing my skin breaking out. Since I tend to have fairly clear skin, this was a major deal breaker.

I was even using foundation that I loved and knew worked well with a variety of primers!  It was so frustrating to have the product tease me into thinking that I made this awesome, cheap, drug store find!  Why can't I be like everyone else and be able to love this product!

My final verdict – Don’t waste your time.  Sorry Nivea!  Get yourself an actual primer and one you know works.  I love many primers.  Rimmel and Mary Kay have two of my favorites and for affordable prices.  They are definitely primers that I would recommend and have actually gone back to using the Rimmel Pro Primer Fix & Perfect (link). This is one of my all time favorites and I constantly go back to it. I'm honestly not sure why I stop using it!

Unfortunately, this time, a new product was a miss for me. I'll probably be passing this onto my boyfriend for it to be used as it's actually intended to be used. I know a lot of people are raving about this product and using it as a primer. To know how how it works for you, you'd have to try it for yourself. But, for me, this was a fail!

Until next time ... Xoxo,
Mikal-Anne

Friday, July 31, 2015

Get Ready With Me Series Part 4 & Ulta Lip Crayon review


Welcome back!! I hope that everyone has had a great week!  I’m not going to lie, I am super excited for the weekend.  We have gone out of town for the last three weekends in a row! I feel like all I’ve done is pack, unpack, laundry, repeat!  I don’t know about anyone else, but being out of town can be exhausting!  I’m not complaining because I am really blessed to be able to be doing the things I’m doing, it just leads for busy weeks between work, and playing catch up from the weekend!

This weekend though, we have a wedding for one of the BF’s friends, that’s in town and that’s it!  I’m definitely looking forward to some down time!!

Now… onto the real reason you’re here!  The fourth and final installment of the Get Ready With Me and Review series!!  The last three weeks we have covered the look up to the point that my face look is done and we’re on to eyes and lips. 

If you missed the reviews, we’ve covered NYX HD Concealers (link), CoverGirl 3-in-1 Foundation (link), and HIKARI blush (link)

Today’s review will be on the Ulta Lip Crayon!!

Now, getting started on the look … I know some people do their make up in a different order, but I’ve always been a person who does my face, then eyes, and finish with lips.  Now that my face is done, let’s get started on the face!  Some of this may sound familiar because many of these products are ones that I used in my Every Day Smokey Eye look (link).  Today, however, I was going for a lighter look and so I left out some of the darker shades.


I start with the Mary Kay Eye primer – this happens to be what is in active rotation in my collection right now, I’ve used this for years!

Ulta eye shadow in Bermuda Sand - I apply this all over my eye lid and all the way up to my eye brow.  I use this shade pretty much every day.  Most of my eye looks have this as the base under everything!

Urban Decay eye shadow in Beware from the Oz Great & Powerful pallet - I take this on a big fluffy brush and apply it in my crease.

Urban Decay eye shadow in West from the Oz Great & Powerful pallet - I use this shadow to darken up my outer corner of my eye lid

I then go back in with Beware to buff out West and create a more natural transition.

Ulta eye shadow in Au Naturel – I also use this one every day. The light pink is the perfect shade to blend out the shadows and add just a bit of highlight under my brow.  Taking a big fluffy brush I buff and blend out the edge of the other shadows up to my eye brow. 

For my liner, I apply Revlon Color Stay eye liner in Brown to both my upper and lower lash line. Using the built in smudger to smudge out my lower lash line making sure to only going about 3/4 of the way into my inner corner.  I then use a brown eye shadow to set all of my liner to ensure it will stay all day.  Setting a pencile liner will also help soften any lines. 

Now the last part of my look… Mascara… and I am still using multiple mascaras.  I don’t think it’s possible to get one mascara that adds length, volume, and separates!  The three in rotation right now are:

Revlon Lash Potion by Grow Luscious in Blackened Brown
L'Oreal Paris Extra Volume Collagen Mascara in Black Brown

Almay One Coat, Get Up & Grow in Black Brown


Once my eyes are done, it’s now on to my lips…  Before I even start my makeup, I make sure to pay attention to my lips.  When I am applying my face moisturizer I also apply some to my lips.  Right now I just have a container of Carmex on my vanity that I apply.  This helps in a few ways.  First, by applying moisture to my lips, but also by creating a barrier.  This allows for me to apply all of my face products without staining my lips.  No one likes the foundation on your lips look!  Well, at least I don’t!  SO, once I’m done with all of my other makeup I wipe off my lips (this is usually because I’m brushing my teeth before work!) and then apply whatever lip look I’m going for.

A while back, I placed an Ulta order online and the thing I love about shopping online with Ulta is they send you samples.  Included in my order was a sample of Ulta’s Lip crayon. 

I was super excited when I opened the package and saw that it was a normal color and actually a color that I would purchase!  On top of that, it is a good product!  It has a good color pay out.  This shade is a my lips but better shade.  On top of that it’s creamy and lasts! 

The one thing I don’t like about some lip crayons are the ones that you have to sharpen!  Ugh, who has time for that!?  This one is in a tube that you just twist up when you need more.

This has become a staple in my routine.  It pretty much lives in my purse because I wear it almost every day to work and whenever I’m out and about and need to add some color.  It’s not a color that you really have to think about.  No liner or gloss needed.  Perfect for on the go application!

That’s it for my makeup!  As for my hair, it kept it simple. After blow drying I just used a straightener to quickly straighten out any kinks and to make sure that all of my ends were turned it.

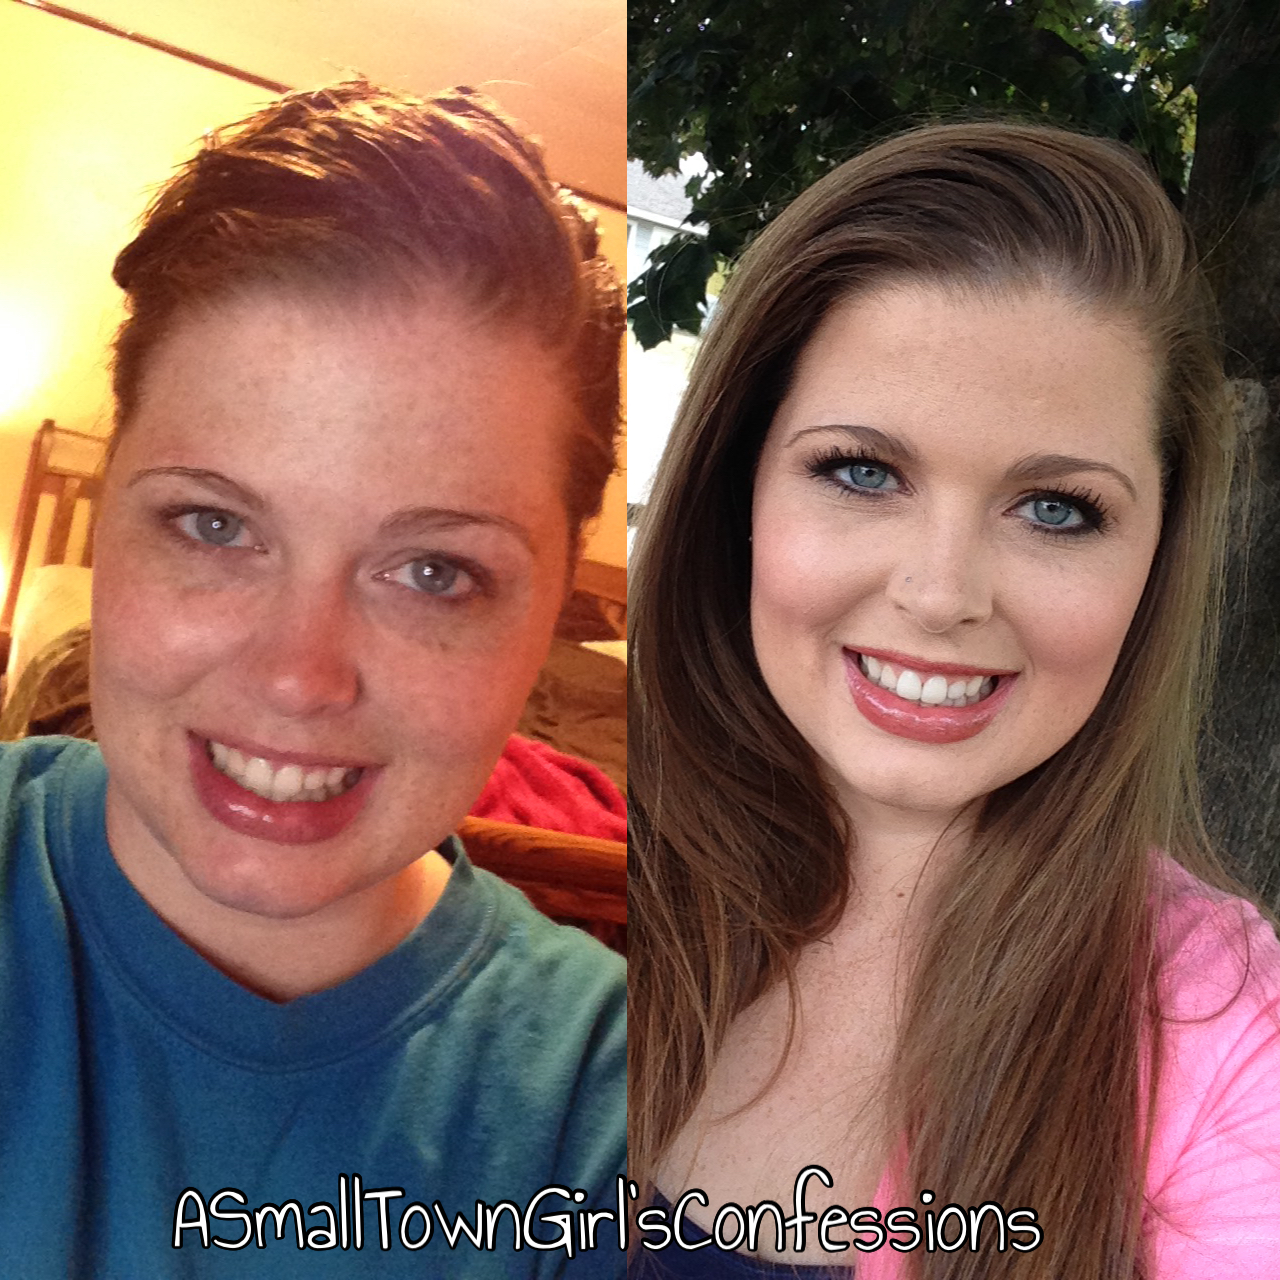
Here's the before and after again!


Breaking it down into many blogs makes it seem like a lot of steps, but this is a really simple look.  Actually, it’s pretty close to my go to look when I just need to get out the door.  You look put together, but not overdone and it doesn’t take long to get out the door.

What does everyone thing of this series!? Is it something you’d like for me to do again?  Let me know!

Also – let me know if you have any products you want me to demo or review! I’m also up for suggestions!!

Are you ready for another review?!  I’ve been on a reviewing kick lately.  Lots of new things to share.  Next week I’m going to talk about Real Techniques’ Miracle Complexion Sponge and the best way I’ve found to clean it!

Until next time lovelies!

Xoxo,
Mikal-Anne


Friday, July 3, 2015

Get Ready With Me Series Part 1 & NYX HD Concealers


Hello Lovelies! Today is going to be the first day of a series that I have never tried before.  This series will be a multi part blog, one each week, that follows along as I do a full face look.  It will essentially be a Get Ready With Me Post. But, the fun twist, I will be doing reviews along the way.

Below is a picture of my bare face look and then the finished look.  


This is such a simple look and is pretty close to the everyday smoke eye blog I posted a few posts ago (link), just a little bit lighter of an eye look. 


Let's get started!


So, a breakdown of the picture above.  The picture on the right is me with a bare face.  As you can see I have that traditional fair and freckled skin issues.  I struggle with some pretty intense under eye dark circles and my freckles tend to make my skin look a bit splotchy. All I have on in this picture would be my moisturizer and on this day I also had some extra sunscreen because I knew I was spending the day in the sun.  Many of my products already have SPF in them, but I like to add face specific sunscreen for some extra little punch of protection!  Gotta love being fair skinned! lol ... oh! I also have a foundation primer on.

I use two shades of the NYX HD Concealer.  I use the Beige shade very first. In the picture by the '1' I have applied the Beige shade in this step.  I have applied this in a few different ways.  I've used my beauty blender and also my Sigma flat top kabuki brush and i have found that I like to do a bit of a combination.  I use the little applicator to apply it under my eyes in a bit of a triangle shape to ensure I'm getting all of my dark circles covered.  I use my flat top kabuki brush to blend it in and then if I feel like I need to help it sink in a little more then I will use my beauty blender to kind of press it into my skin. This shade is a pretty good match for my skin tone already and definitely does a good job of covering those circles. 

After I apply the Beige shade I will then apply my foundation.  On this day I used the Covergirl 3-in-1 Foundation.  Next week's blog I will go over this and share my review of this product!  Stay tuned!

After I have applied my foundation, I will then use the Porcelain shade as an under eye highlight.  I apply this in the same way as the other shade.  I use the applicator to get the product on my face then then blend it out with the Sigma flat top kabuki brush.  I then go back in with my beauty blender to ensure that both the concealers and the foundation are blended well.

This may seem like a lot, but I promise it isn't!  I make sure to use my Tarte finishing powder to set my concealer.  Another important thing, when you are setting your foundation, try to stay away from where you've applied under eye concealer, this helps ensure you don't get a cakey look.

Now... what do I think...

I LOVE THIS PRODUCT!  Way to go NYX!  

If we're being honest, I'm not surprised at all because I don't think there is a NYX product that I've tried that I haven't liked.  The concealer does a good job of both covering up my dark circles, but it doesn't fade throughout the day or settle into any lines.  We all have those little lines around our eyes and in my opinion, nothing can age someone more than to have product settled into those lines.  

I know it seems like over kill that I use two shades of concealer and if I"m being honest, I don't always do this!  If I'm doing a quick look, I will apply my foundation and then just use the Porcelain shade to conceal and highlight and it works great!  

If you're interested in trying this out click here and you can head on over the the Ulta website to take a peek!

Make sure you come back next week to see the next etep and my review of the CoverGirl 3-in-1 Foundation!

I hope everyone has and amazing Independence Day weekend ahead!

Until next week!

xoxo,
Mikal-Anne